Class 11 Sample Paper 2022 Solution Engineering Graphics Term 1
Finished viewing? Save it for later —
Download Class 11 Sample Paper 2022 Solution Engineering Graphics Term 1 (PDF · 3 pages)About Class 11 Sample Paper 2022 Solution Engineering Graphics Term 1
Class 11 Sample Paper 2022 Solution Engineering Graphics Term 1 is available here for free download. Published by AglaSem for Class 11, this sample paper can be viewed online or downloaded as a PDF (3 pages). Candidates preparing for Class 11 can use Class 11 Sample Paper 2022 Solution Engineering Graphics Term 1 to understand the exam pattern, the type of questions asked, and the overall difficulty level.
Frequently Asked Questions
How can I download Class 11 Sample Paper 2022 Solution Engineering Graphics Term 1?
Open this page and click the Download button to save Class 11 Sample Paper 2022 Solution Engineering Graphics Term 1 as a PDF. It is completely free on AglaSem Docs.
Is Class 11 Sample Paper 2022 Solution Engineering Graphics Term 1 free to download?
Yes. Class 11 Sample Paper 2022 Solution Engineering Graphics Term 1 can be viewed online and downloaded as a PDF free of cost on AglaSem Docs.
How many pages does Class 11 Sample Paper 2022 Solution Engineering Graphics Term 1 have?
Class 11 Sample Paper 2022 Solution Engineering Graphics Term 1 contains 3 pages, which you can read online or download together as a single PDF.
Where can I find more Class 11 study material?
You can find more Class 11 question papers, sample papers, syllabus, and answer keys on AglaSem Docs.
Class 11 Sample Paper 2022 Solution Engineering Graphics Term 1 – Text
Read the full text of this sample paper below — useful to quickly search, copy and reference the content online without downloading the PDF.
📄 View text version (3 pages)
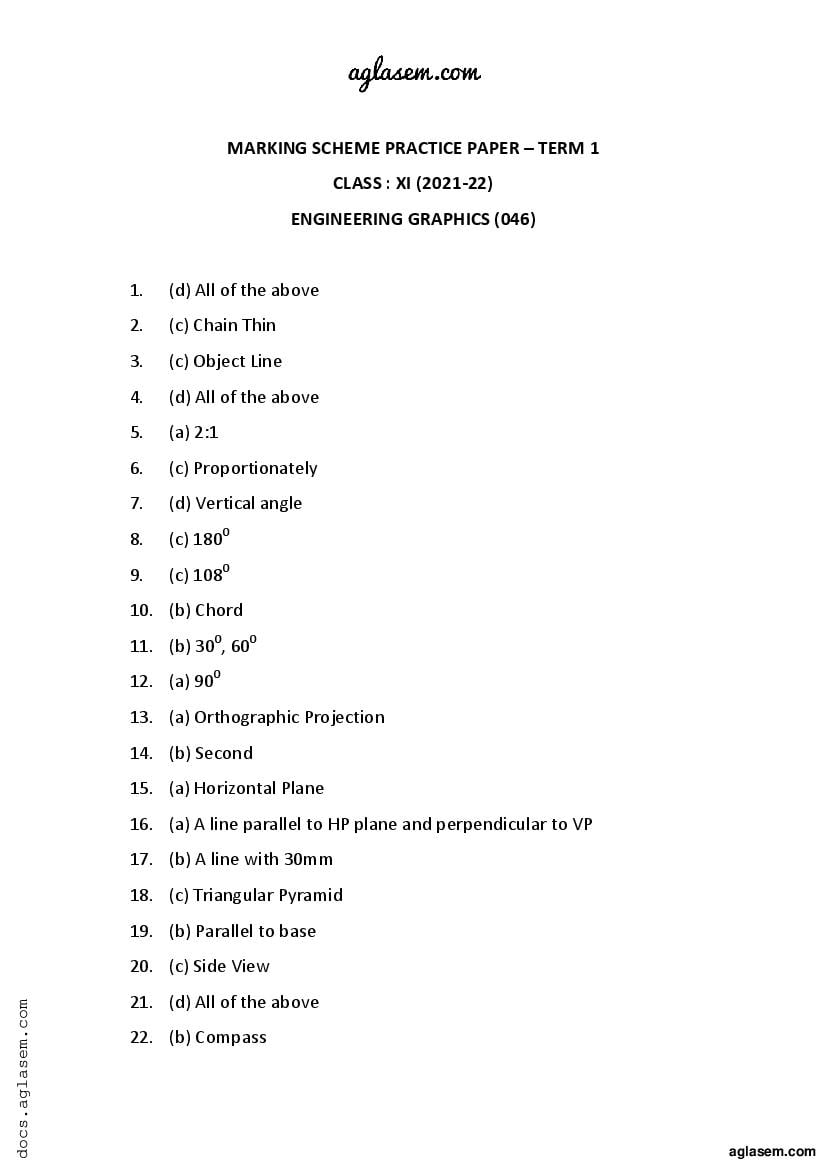
Page 1
CLASS : XI (2021-22)
ENGINEERING GRAPHICS (046)
1. (d) All of the above
2. (c) Chain Thin
3. (c) Object Line
4. (d) All of the above
5. (a) 2:1
6. (c) Proportionately
7. (d) Vertical angle
8. (c) 1800
9. (c) 1080
10. (b) Chord
11. (b) 300, 600
12. (a) 900
13. (a) Orthographic Projection
14. (b) Second
15. (a) Horizontal Plane
16. (a) A line parallel to HP plane and perpendicular to VP
17. (b) A line with 30mm
18. (c) Triangular Pyramid
19. (b) Parallel to base
20. (c) Side View
21. (d) All of the above
22. (b) Compass
Page 2
24. (c) Millimetre
25. (d) None of these
26. (a) Inscribing
27. (d) 900
28. (b) Two
29. (d) All of the above
30. (b) Thin and continuous
31. (c) Divider
32. (a) Right Angle
33. (a) Same
34. (c) Touching VP and HP both
35. (a) Touching HP and 50mm from VP
36. (d) Touching VP and 60mm from HP
37. (c) 35mm from HP and 55mm from VP
38. (c) Sphere
39. (d) Parallel to VP and HP both
40. (b) A hexagonal pyramid resting on its base
41. (b) It is an upright solid
42. (a) Both A and R are true and R is the correct explanation of A
43. (a) Both A and R are true and R is the correct explanation of A
44. (b) Both A and R are true but R is not the correct explanation of A
45. (d) A is false but R is true
46. (d) A is false but R is true
47. (d) A is false but R is true
48. (b) Both A and R are true but R is not the correct explanation of A
49. (a) Both A and R are true and R is the correct explanation of A
Page 3
51. (a) Trapezium
52. (b) Perpendicular to HP
53. (a) Square
54. (b) Prism
55. (c) Cylinder
Document Details
| Board / Org | Aglasem |
| Exam | Class 11 |
| Type | Sample Paper |
| Pages | 3 |
| Updated | 22 Jul 2026 |